
Painting a wrought iron fence can be done, but it’s important that you follow a series of steps in order to ensure your paint job is successful.
Wrought iron fences give a place a look of class and style, but time and weather can take a toll on the metal and cause rust and fading to occur.
Bringing your wrought iron fence back to its original look can sound overwhelming, but rest assured, it’s not as hard as you think.
In order to paint a wrought iron fence, remove any old paint or spots of rust, and then prepare the fence’s surface. After that, apply the right primer and then you’re ready to paint the fence!
If it’s time to tackle painting your wrought iron fence, and you will be pleased with the results if you follow these steps.
Painting can be fun, but also frustrating if not done in a certain way, and no one enjoys spending a weekend doing a project, only to have to re-do it again.
Wrought iron poses some of its own challenges to paint, but your project will be successful if you follow the five steps outlined.
I enjoy home improvement projects, especially ones that involve painting.
Keep reading to find out how you can have a positive experience with painting your wrought iron fence and restore it back to the glory it deserves.
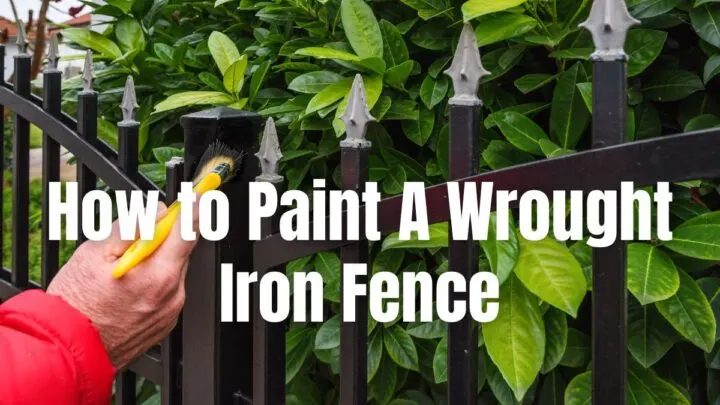
How to Paint a Wrought Iron Fence
A fresh coat of paint can make just about anything look better as well as increase how long it will last.
A wrought-iron fence is a beautiful investment but will need some care in order to continue to look nice and perform well, and a new coat of paint every two to three years will ensure its strength and beauty will continue to last for decades to come.
1. Pick the Right Time to Paint
When you are painting, it’s important that you pick a time of day or year where the weather conditions are ideal.
Paint won’t adhere well to a surface when the temperature is below 50 degrees, and a day where the temperature is above 85 degrees can result in the paint running.
The level of humidity can also be a factor in your overall painting success.
High levels of humidity will cause water droplets to sit on your new paint, which will make it hard to dry and cause running, especially on a surface like wrought iron.
While a little humidity will actually help the drying process, aim to paint on a day when it’s not more than 50% humid.
Finally, try to avoid painting on days when it’s super sunny, as direct sunlight can cause the paint to streak.
2. Remove Old Paint or Any Spots of Rust
Before placing any paint on the surface of your wrought iron fence, you will need to remove as much of the old paint as you can, particularly in any areas where there is peeling.
Not only will this give your fence a smoother, cleaner look, but it will prevent the old paint from later peeling off and disrupting your new paint job.
Give your whole fence a good once-over, looking for any spots where rust has appeared.
Rust will ruin a new paint job very quickly and by leaving any rust spots, you are kind of defeating the purpose of repainting your wrought iron in the first place.
Old paint and rust can both be sanded smooth to remove.
If you have a large fence, or lots of areas of peeling paint or spots of rust, you may want to invest in a flap disc, which will help you get the job done faster.
These rotating discs can be widely purchased and attached to a rotary tool, like a drill, to help remove existing paint and rust much faster than trying to sand it by hand.
3. Prepare the Fence’s Surface
After you’ve removed the old paint and rust, gently clean the iron’s surface with some sudsy water (dish soap works great) and then hose it all down and let it dry.
You can even run a towel over the wrought iron to ensure there is no lingering paint, rust debris, or water droplets.
Give your fence a bit of time to fully dry before you start, but try to do it all on the same day so that dust, pollen, or any other unwanted debris doesn’t reappear before you get started.
4. Apply the Right Primer
You may be ready to dive right in with your paint project, but you will be unhappy with the final results if you don’t take the time to prime your fence first.
Primer is crucial in the painting process for wrought iron, because of the nature of iron and paint.
Without the primer, your final paint will have nothing to adhere to and you will end up with a streaky mess.
Choose a primer that prevents rust and consider an aerosol application over a traditional brush-on kind, since the aerosol will go on smoothly and more quickly than using a brush.
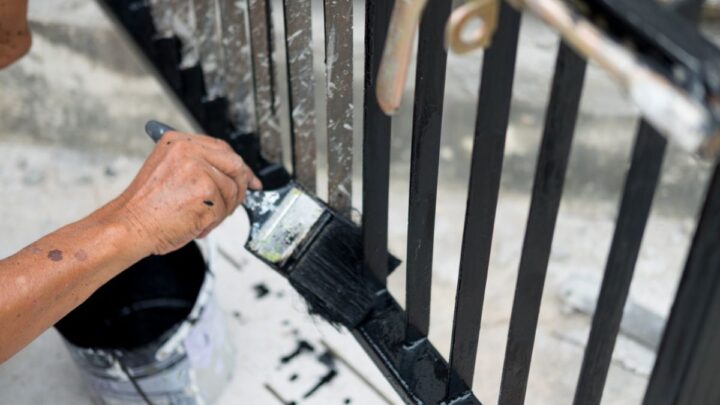
5. Apply the Right Paint
Finally, it’s time to paint! If you’ve done all the other steps as outlined, this part should be fun and a breeze.
There are a wide variety of colors to choose from, so have fun with this part.
Your paint can be applied in aerosol form, like your primer, or brushed on – your choice.
When purchasing your final product, make sure it’s a paint that will work well with wrought iron and can withstand the weather elements of being outdoors.
Any reputable paint store can help you with this or you can find lots of suggestions and color options online.
Summing Up Painting a Wrought Iron Fence
It can be daunting to think about painting a wrought iron fence, but it doesn’t need to be. As long as you prepare and clean the surface beforehand, and then make sure you prime it, the painting process should be a breeze.
You can always call a professional if you decide you don’t want to DIY after all!

Linda Speer
Monday 30th of March 2026
Who would you recommend to prepare and paint a small wrought iron fence