

Can you install vinyl plank flooring on an uneven floor? Known for its affordability and diverse designs, vinyl plank flooring demands a level surface for optimal longevity.
While slight unevenness might be manageable, a significantly uneven floor can accelerate wear with vinyl plank flooring. For the best outcome, consider leveling the floor before installation or exploring alternatives like laminate.
Dive in to grasp the intricacies of this flooring dilemma.
Table of Contents
Can Vinyl Plank Flooring Work on an Uneven Floor?
Before installing the vinyl plank flooring, you must check the floor level by using the bubble level to find any dips or humps.
In the worst case, uneven flooring will cause clipping when you step on the gap, and the plank will go down.
However, a slightly uneven floor should not stop you from installing vinyl plank flooring.
Unlike hardwood floor planks, vinyl planks are softer and will cover the slight leveling flaws on the floor.
But if the floor is highly uneven with visible humps and dips, you should stick to laminate flooring or ceramic tiles.
If you are looking for other options due to a more uneven floor, carpet is a popular choice since it is the most flexible. You can bend, turn, fold, and roll a carpet in any way.
However, just because you have a slightly uneven floor does not mean you should give up on your preference for a vinyl plank flooring.
These planks are sturdier and can withhold slight flaws in the floor. But before you prepare to install them, ensure that the floor is free from all pollutants such as dust, debris, etc.
You can do this by washing and wiping the floor clean.

How Uneven Can the Floor Be to Install Vinyl Flooring?
If you are installing vinyl plank flooring on an uneven floor, it is crucial to know the exact measurements of the gaps, heights, and deepness of the humps and dips on the floor.
You can install the flooring as long as there aren’t any more gaps, humps, and dips than 4.76mm per 10ft radius.
If there are more flaws than the defined amount, the gap will be more than the vinyl planks can bear, and they will wear out much quicker due to more bending.
Moreover, it will also have more space to trap water and moisture beneath the planks, resulting in additional wear and tear.
How to Install a Vinyl Plank Over an Uneven Floor
Luckily, vinyl plank flooring is one of the easiest floors to install. Although leveling the uneven floor first adds a few steps, we will explain how to do that quickly and easily in this section.
You will need this equipment and tools to install vinyl plank flooring.
- Vinyl planks
- Double-headed mallet
- Enhanced pull bar
- Tapping block
- Measuring tape
- Saw
- Knee pads
- Bubble level
- Steel square
Once you have all the required tools and equipment, follow these steps to install vinyl plank flooring on an uneven floor.
Preparing the Floor
When installing the vinyl plank flooring on an uneven floor, the first part is to prepare the bottom so the planks have the best possible base to fit correctly.
1. Measuring the Floor
The first step is to rule out all deformities, including humps, dips, gaps, etc., by placing a bubble level on the floor and marking the deformities.
Once you have identified the deformities, mark areas around them to divide them into territories.
2. Level Any Deformities
Sand any humps you have marked to level with the floor. If there are dips and pits, fill them with a self-leveling compound, usually a mixture of cement and water.
After pouring the self-leveling compound, level it with a trowel and screed.
3. Remove All Baseboards
While removing the baseboards, including base shoe moldings and doorcase moldings, is not necessary, it is recommended for clearer and effortless installation.
4. Clean Dust and Debris
Removing all dust and debris particles is vital to allow the planks and adhesive to create seamless contact with the floor.
Even the smallest debris can affect the longevity of a particular area, requiring maintenance and repairs.
Sweep, vacuum, and mop the floor to ensure it is free of all pollutants.
Installing the Vinyl Planks
Start installing the planks once you have performed all the steps above and the self-leveling compound is dry.
1. Plan Your Pattern
You can install the vinyl floor planks in various patterns. Choose the pattern you like, and ensure that you mix the planks from all packages, so the designs are blended well and uniformly.
2. Cut the Planks
You will need to cut the planks using the saw according to the room measurement and the chosen pattern.
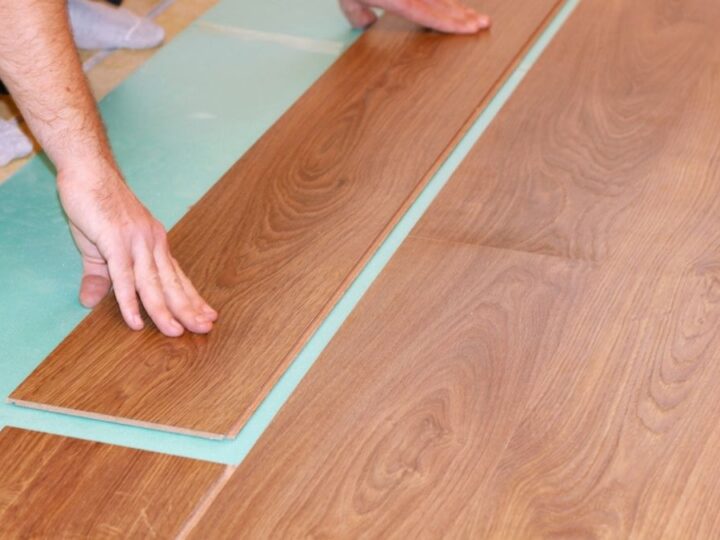
3. Install the Planks
You can now start installing the planks. Apply the adhesive plank by plank, pick one corner, and start.
Make sure the tongue of the plank matches with the groove of the previous one.
Lightly tap the planks with the double-headed mallet to ensure they hold the adhesive.
4. Reinstall the Baseboards
After you have installed all the planks, reinstall the baseboards, and Voila! You have an all-new vinyl plank flooring on a once uneven floor.
Summing Up Installing Vinyl Planks on Uneven Flooring
While you can install vinyl plank flooring on an uneven surface, it’s generally not recommended to do so. This can affect the overall quality of the floor over time and it’s also hard to install on uneven flooring.
Make sure you make the floor as level as possible before attempting to install the vinyl planks. You can also consult a professional to help with either the flooring or leveling process.
